
Today I’m going to show how to use Audacity’s Region Labels to build an audio track that synchs with a video. In the next post, I’ll go through some commands for adding audio to a video with Ffmpeg.
If you don’t already have a working knowledge of Audacity, here’s a good intro: https://www.youtube.com/watch?v=yzJ2VyYkmaA
Time out your video
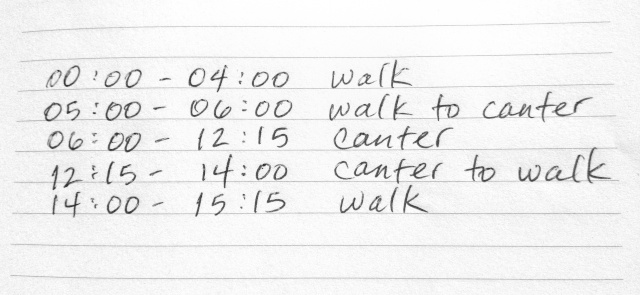
The first step is to watch your video and figure out what audio is needed, then grab a stopwatch and time out each section.
Here’s my animation clip:
The horse’s gait changes will require separate audio tracks, and the ambient sound volume should change to match the horse’s speed.
Here are my notes:
Set up a new Audacity project
Open a new project in Audacity. Tracks_Add New_Label Track, and give it a name.

In the Selection toolbar, set Snap-To Off, with the Selection Format set to the smallest unit of time for your project.

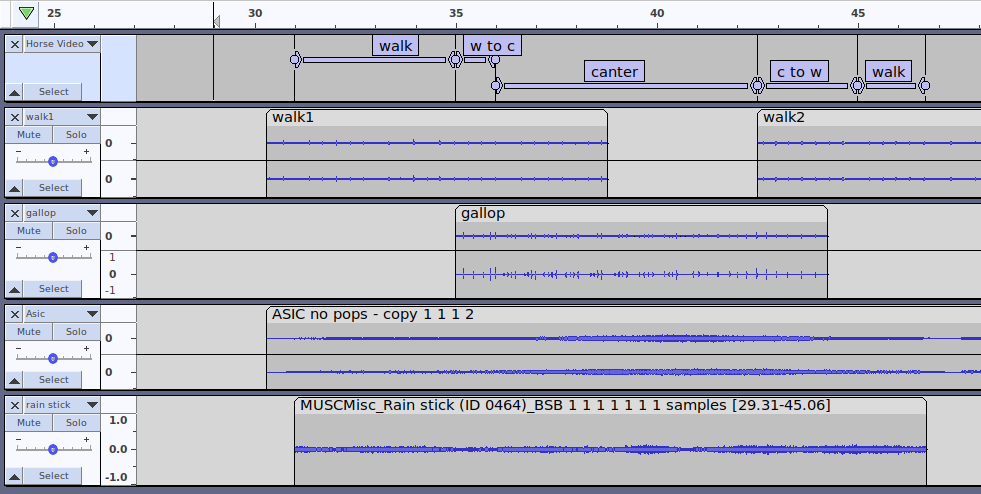
Add Region Labels
Audacity has two options for Track Labels, Point and Region. Region labels are useful when audio sections seamlessly follow each other. As stated in the manual, ‘You can then adjust the end of one label and the start of the next at the same time.’

Add a region label to mark the duration of the first audio section:
- Click on your starting point on the timeline
- Drag to hilight your desired length of time, while watching the counter in the Selection Toolbar
- Ctrl-B to add the label, and give it a name.
- Change the length of a region label by clicking and dragging either of its chevron handles or its circle handle
- Use Alt+Right to jump to the next label; Alt+Left for the previous label.
- To delete a label, Right-click inside the label’s text box and choose Delete Label from the dropdown menu
Use the same method to add a region label for each of your audio sections.
With all the labels added, check to make sure the total labelled area exactly matches that of your video.
Add Audio Tracks and Position on the Timeline
With the timing blocked out, start adding audio tracks: File_Import_Audio.
Reposition clips by dragging on the Clip Handle (the rounded corner area which contains the clip title)
Edit Clips
With all the clips added, now comes the painstaking process of editing. It takes a lot of patience and an ear for detail, but with the timing and labeling done up front, things should go more smoothly.
I recommend exporting the audio frequently and adding it to the video track to check how things are progressing.
Export to .wav
When you are ready to export, make sure Snap-to is still set to Off.
- Hover the Selection tool over the central line or drag-bar of your first region label
- Click and drag down through all tracks and then back up to the drag-bar of your last region label
- With all your audio selected, go File_Export_Export Selected Audio
- Export as .wav
- Save the file in the same folder as your video
Further Reading about Labels:
https://manual.audacityteam.org/man/label_tracks.html
Questions? Comments? Concerns? Leave them in a comment and I’ll do my best to address them. 🙂
