Recently I was looking for a dynamic particle effect that was subtle enough to use as a background.
After a ton of experimenting, I found a combination of GIMP’s Cubism and Motion Blur filters which yielded an interesting look.
I started with a new GIMP file: dimensions 3840×2160, RGB mode, 72 ppi with a black Background layer.
Apply Cubism filter
Add a white layer. (Shift+Ctrl+N)
Apply Cubism Filter. (Filters_Artistic_Cubism. Tile size: 30, Saturation: 2.5
Keep defaults on the remaining settings).
Merge the two layers.
Bump up the Contrast. (Colors_Brightness/Contrast -80 and 80 with defaults on remaining settings).
Name the layer ‘Background.’ Duplicate the layer (Shift+Ctrl+D) and name it ‘Cubism.’ Turn visibility off for this layer.
Add Background Texture
With the Background layer active, select Colors_Colorize .70/.75/-.2
Select Colors_Color Balance: Shadows: 0/0/0 Mid: -7/-48/-31 Highlights: -40/-97/8 with Preserve luminance off
Filters_Blur_Gaussian Blur: 30/30

Colors_Posterize with Levels 157, Mode: Color erase, Opacity 25
Filters_Artistic_Cubism: 37/3.2, Mode: Replace
Filters_Enhance_Sharpen: Radius 7.43, Amount .286, Threshold 0, Mode: Color Erase
Add a new layer filled with black below the Background layer and merge the two layers.
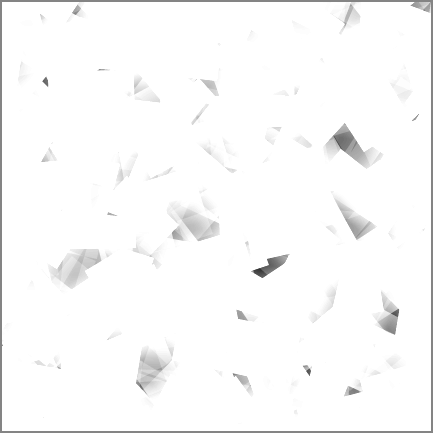
Add Particles
Make the Cubism layer active and visible.
Select by Color (shift+O) with all options unchecked and the Threshold setting around 15, click one of the dark grey areas
With the selection active, Create a new transparent layer (Shift+Ctrl+N)
set the Foreground color swatch to HSV: 128/42/100
Fill the selection with the foreground color (Ctrl+,)
Select none (Shift+Ctrl+A)
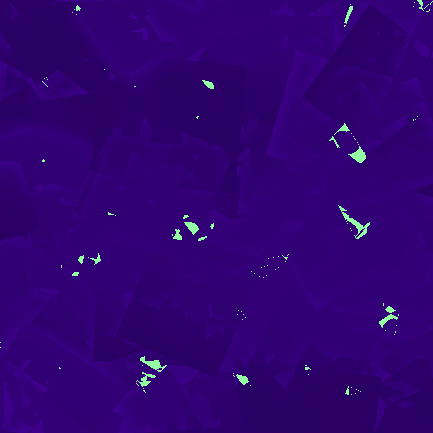
Delete the Cubism Layer and you will have something that looks like the image at left.
Name the layer ‘Particles’ and duplicate it (Shift+Ctrl+D)
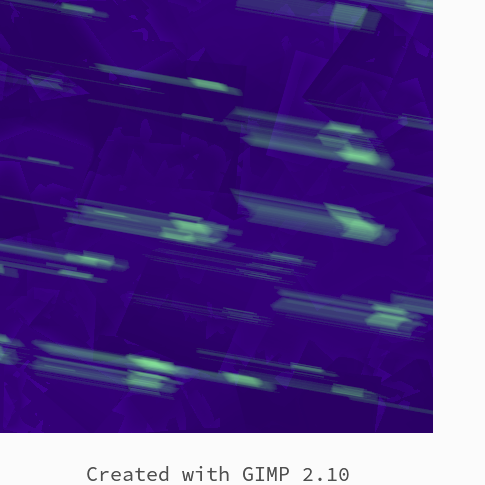
Add Motion Blur
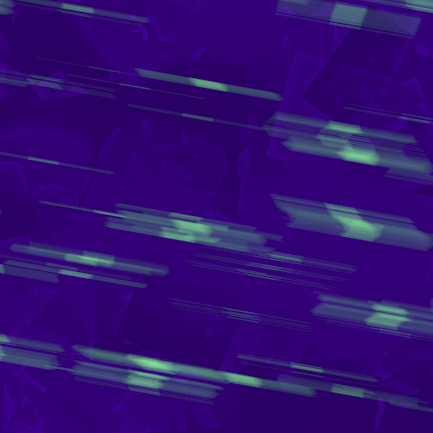
On the top particle layer:
Go Filters_Blur_Linear Motion Blur: Length 140, Angle 10
On the bottom particle layer: Go Filters_Blur_Linear Motion Blur: Length 30, Angle 10
Tweak the Streaks
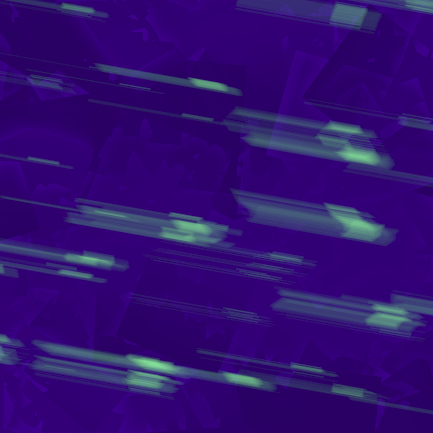
Use the Move tool to shift the long streak layer to the left to simulate a bright spot with a tail.
Composite the layers with Image_Flatten Image, and you’re done.
What’s really cool is you could also use the process to create an animated loop. The particles are generated from the Cubism filter, so starting with a new seed on each frame creates a unique set of particles.
Note that for different file dimensions, Cubism tile size and Motion Blur length settings must be adjusted to get the same look.
Unfortunately GIMP does not have Photoshop-like Actions to record a series of steps. Gimp macros must be custom coded.
Further Reading
- https://www.gimp.org/tutorials/Automate_Editing_in_GIMP/#an-introduction-to-macros
- https://docs.gimp.org/en/gimp-concepts-script-fu.html
Questions? Comments? Concerns? Leave them in a comment and I’ll do my best to address them. 🙂
